Introduction
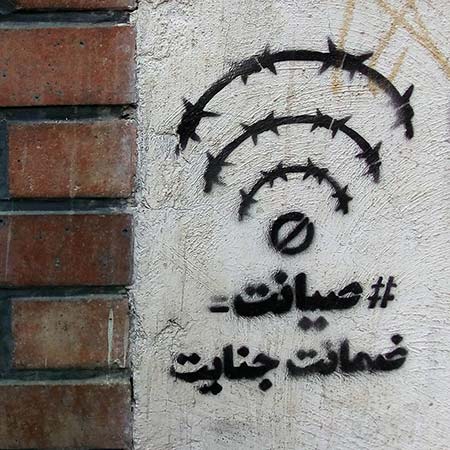
All countries have some limitations or government-imposed restrictions on the internet that ban end-users from accessing certain websites, services, applications, etc. In such countries, end-users face difficulties connecting to the internet and accessing the services they want. They have two options in these situations:
- Paying money to technical experts who can provide methods to bypass these restrictions.
- Creating their own solutions to bypass those restrictions, though this requires technical knowledge.
If you don’t want to read the technical description or just want to skip the fundamentals, go straight to the Getting Started section.
Technical Description
First, let’s understand how these restrictions work.
When you want to access something on the internet (like a website, a service, or an application), you first need to find the address of the server hosting that service. If a service is up and running, it means someone, somewhere in the world, programmed it and deployed it on a computer we call a Server, which serves that service to you. Like real-world mail, if you want to send a package to someone, you need their destination address. Without it, you can’t send the package. However, there’s a difference between real-world addresses and computer addresses. Real-world addresses can be represented as geo-locational data (latitude and longitude pairs) or as text. With these, you can locate a friend’s house or a new building. But how do you find the address of a computer? What does it even mean? When we talk about a computer’s address, do we mean its geo-locational address? Definitely not! A building’s address is entirely different from a computer’s address, but both follow the same principle:
Every communication system operates based on how it defines its addresses.
So, how are addresses defined in computers? The answer is simple: Protocols.
Protocols
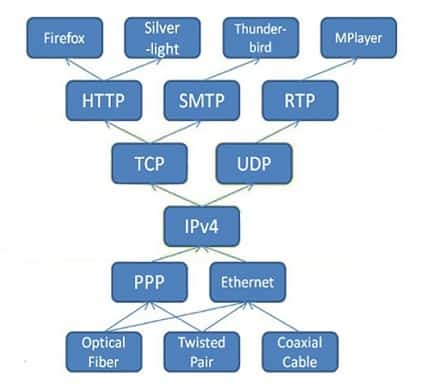
In computing, we have different protocols for different tasks. There’s FTP (File Transfer Protocol), HTTP (Hypertext Transfer Protocol), LDAP (Lightweight Directory Access Protocol), and more. Each protocol is designed for a specific task, and because tasks vary, so do the methods of data transportation. Essentially, protocols handle data transportation in different ways, and because of these differences, they might use different address formats. Yes, they might—they’re not required to. But why? Because protocols can be chained together. They can rely on each other. For example, Protocol A might depend on features from Protocol B, which in turn relies on Protocol C to function as intended. For instance, all the protocols mentioned above (FTP, HTTP, LDAP) rely on a combination of protocols called TCP/IP. These are two separate protocols: TCP (Transmission Control Protocol) and IP (Internet Protocol). When used together, we refer to them as TCP over IP or TCP/IP.
IP
IP is the protocol of the internet. It has 16 versions in total (versions 0 to 15), but only two are actively used in networking today: IPv4 and IPv6. The other versions are either unassigned, abandoned, or obsolete. This protocol assigns an address to a computer. For example, IPv4 addresses consist of four numbers (each less than 256) separated by dots (with an optional suffix), like 192.168.50.88/24. This address reveals several things:
- Which network this node belongs to
- The network’s capacity
- Which nodes can locate this node
TCP
TCP, on the other hand, is the protocol that controls data transmission. It manages how data is sent or received by a node. This protocol alone can’t create what we know as the Internet, which is why we combine it with the IP protocol. Together, they enable computers to:
- Have an address and be recognized on networks
- Control how data is transmitted between nodes
So, if you’re unable to connect to a website, the issue could lie in the TCP/IP stages—either on your end or the sender’s side. Since you’re not imposing any restrictions, the reason for the connection failure is clear: Your Internet Service Provider (ISP).
ISP
In all countries, the government has unrestricted access to the internet. The government then shares this access—and the ability to provide it as a service—with companies known as ISPs. ISP stands for Internet Service Provider. These companies must comply with government policies. They provide internet to users based on the government’s rules, meaning if the government restricts access to a website, ISPs must do the same—or face penalties or shutdowns. ISPs constantly intercept user requests, check for restricted destinations, and block them.
Now you know that you don’t receive your internet directly from the government. You get it from ISPs. But if you can’t access a website, it’s because the government has restricted it, forcing ISPs to comply (even if they might not agree).
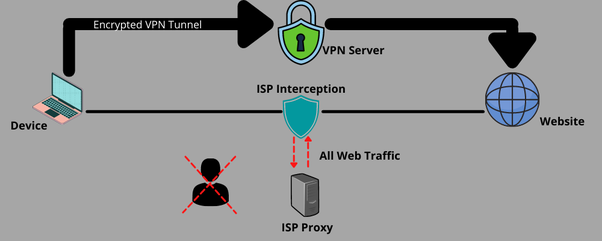
So, what’s the solution? If the government holds all the power, how can you use (almost!) unrestricted internet? The answer is VPNs.
VPN
What is a VPN, and how does it bypass government-imposed internet restrictions? Let’s first review how your request is processed by an ISP:
- You send a request to access a website.
- The ISP checks if the destination is on its blacklist. If it is, the request is rejected.
- If it’s not blacklisted, the ISP forwards your request and returns the result to you.
This system has a flaw. You can send a request to a non-restricted server and ask it to fetch restricted content for you. Since the non-restricted server isn’t bound by your country’s policies, it can access the restricted service on your behalf. But how? You can’t physically travel to another country just to visit a website. Instead, you need to place yourself virtually in the network of a non-restricted server. Once you do this, all your requests appear to originate from that server. Since the non-restricted server is in another country, its ISP processes your request according to that country’s policies. This is called a VPN (Virtual Private Network).
Now, there’s a catch: You need a server in that country to set up a VPN. You can use a VPS (Virtual Private Server). These servers are called “virtual” because you don’t physically access them—instead, you connect remotely using protocols like SSH (Secure Shell) or FTP and execute commands on them.
All you need to do is find a foreign VPS hosting service and purchase a server (if you can’t buy one from your country—like in Iran—some services accept cryptocurrencies). Once you’ve bought a server, the VPS provider gives you a username and password to connect via SSH.
There are different types of VPNs. We’ll use X-ray, along with a graphical panel called 3x-ui, developed by Hossein Sanaei.
Getting Started
First, log in to your server using SSH with this command:
ssh [username]@[Server-IP]For example:
ssh root@10.0.2.15Enter your password and press Enter (the password won’t be displayed).
Then, run this command on your VPS:
bash <(curl -Ls https://raw.githubusercontent.com/mhsanaei/3x-ui/master/install.sh)Full installation instructions and official documentation can be found here.
The script will download or update necessary packages. When prompted to change default settings, type y and press Enter.
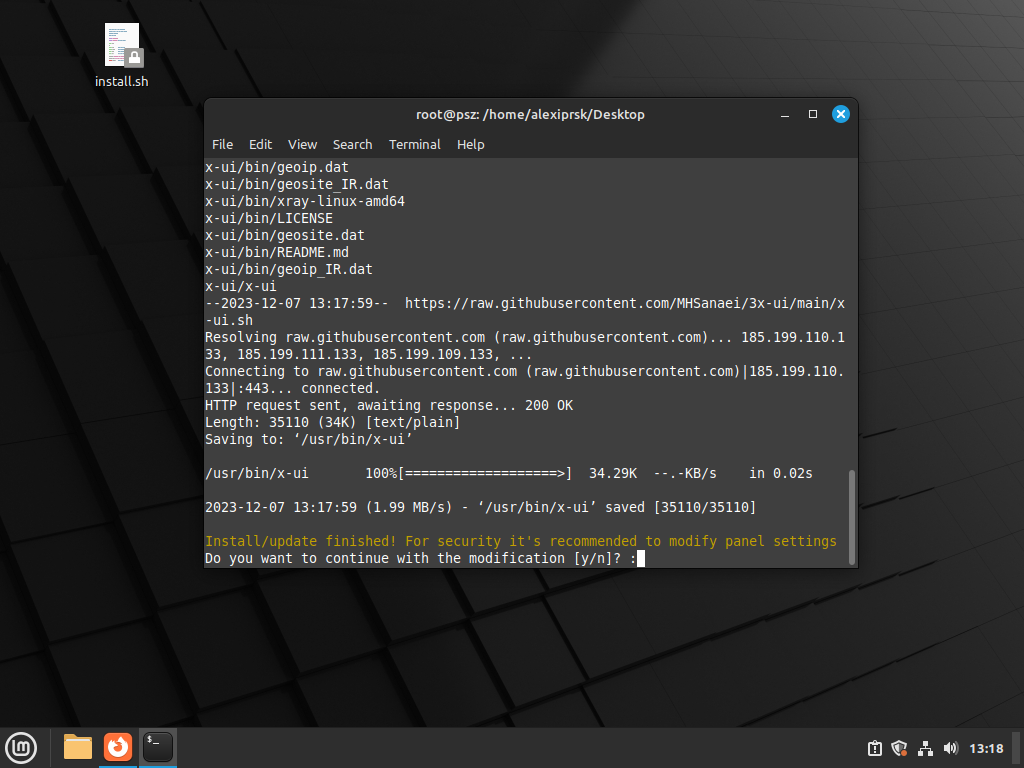
If the installation ends like this, the 3x-ui panel has been successfully installed.
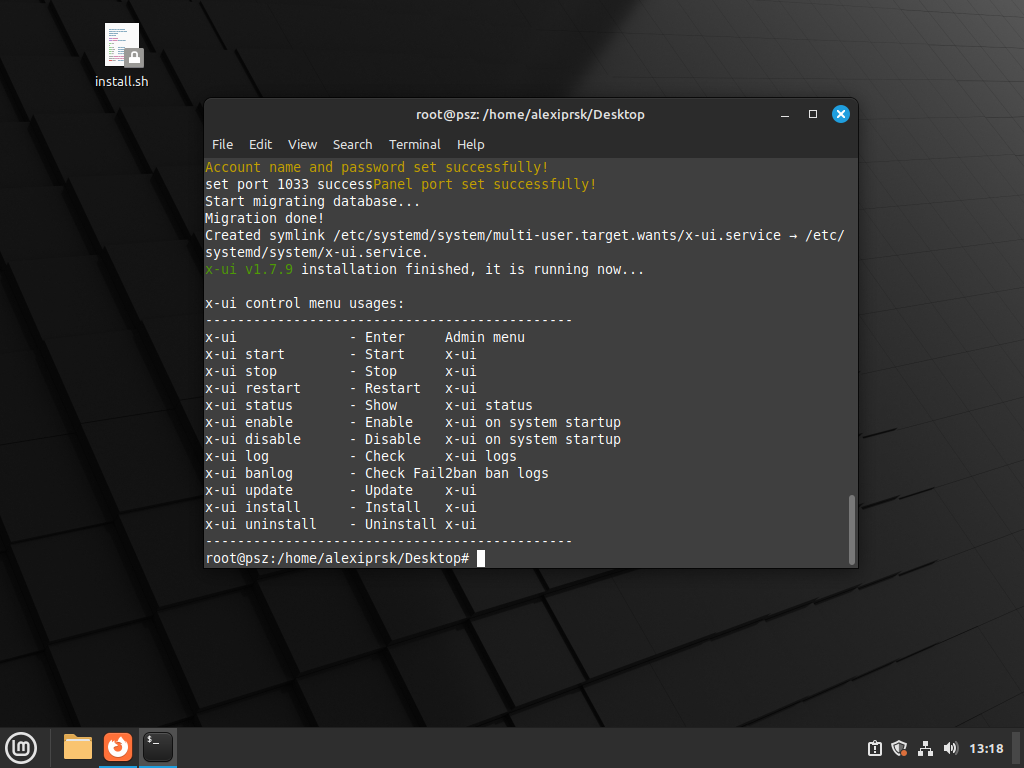
Next, log in to the panel. The panel’s address will be:
http://[server_ip]:[default_or_changed_port]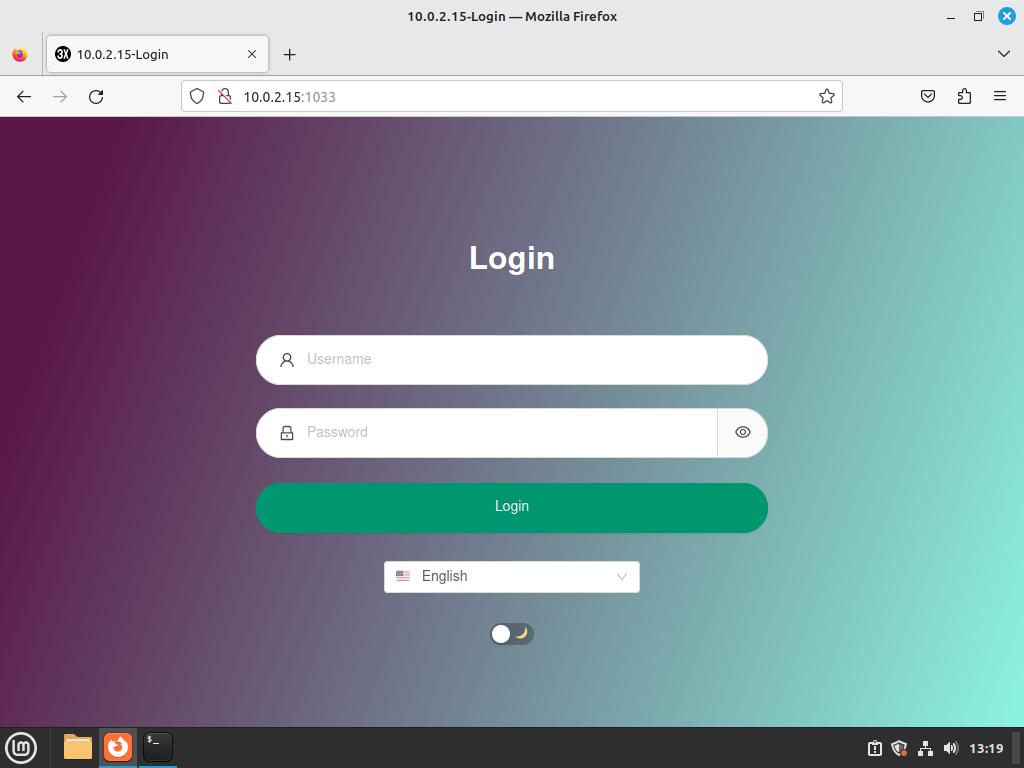
Use the credentials you set during installation. After logging in, click on Panel Settings.
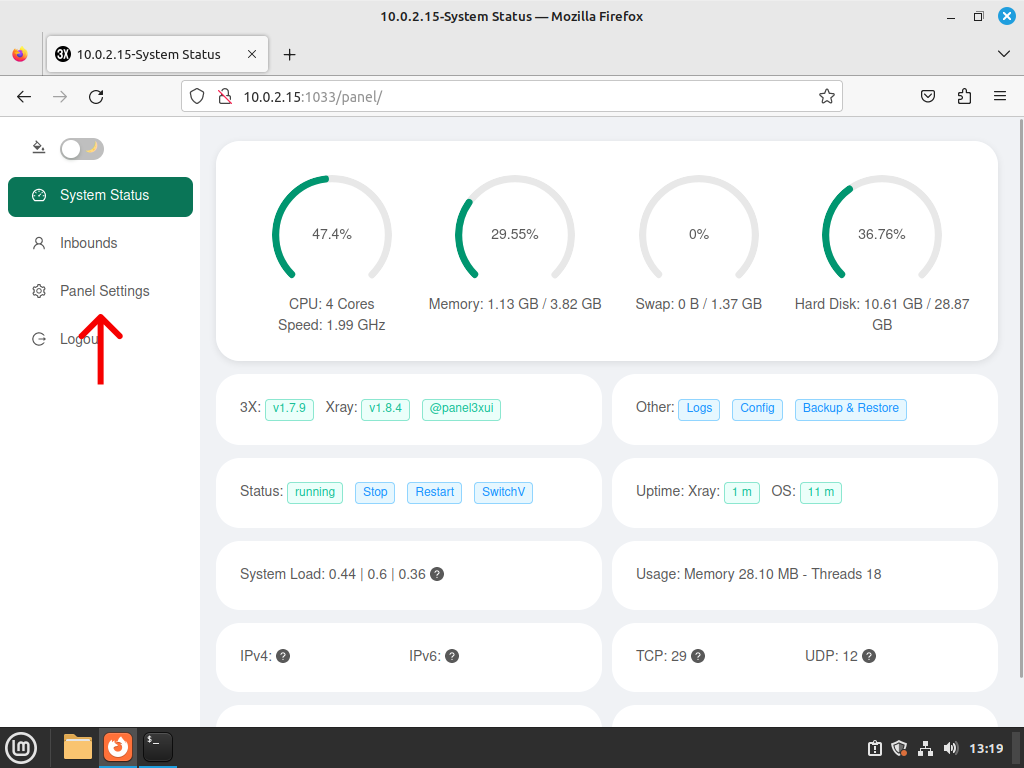
Find Panel URL root path and change it to a custom path starting with / (This enhances security by preventing directory attacks, especially if you use the default panel port).
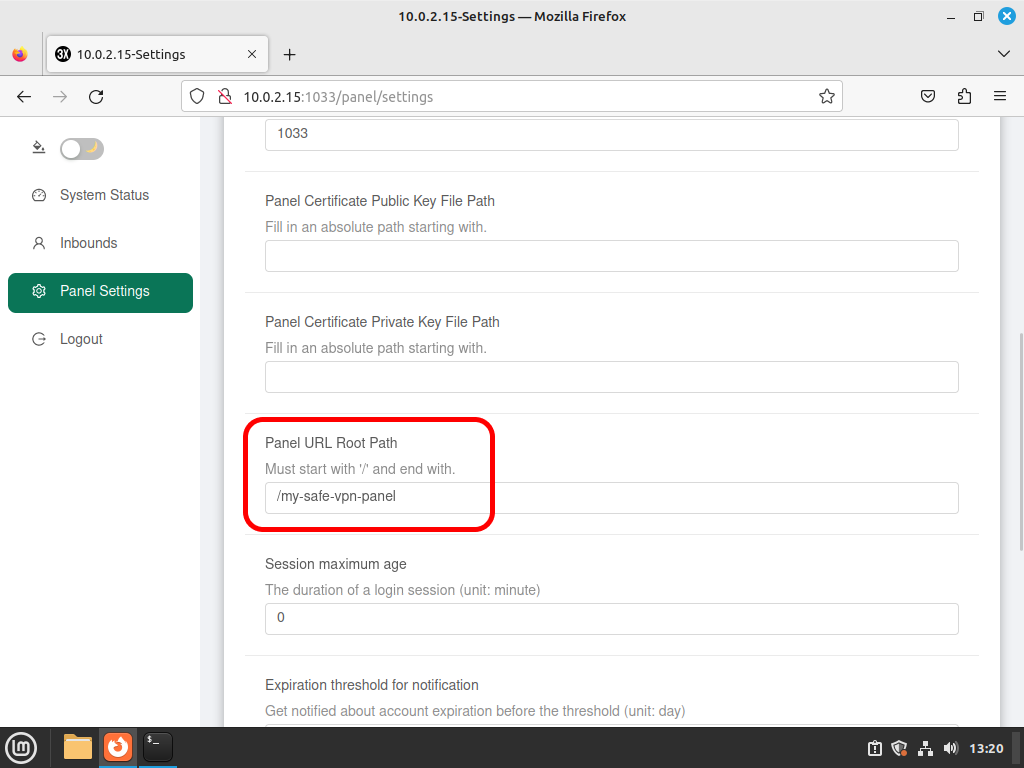
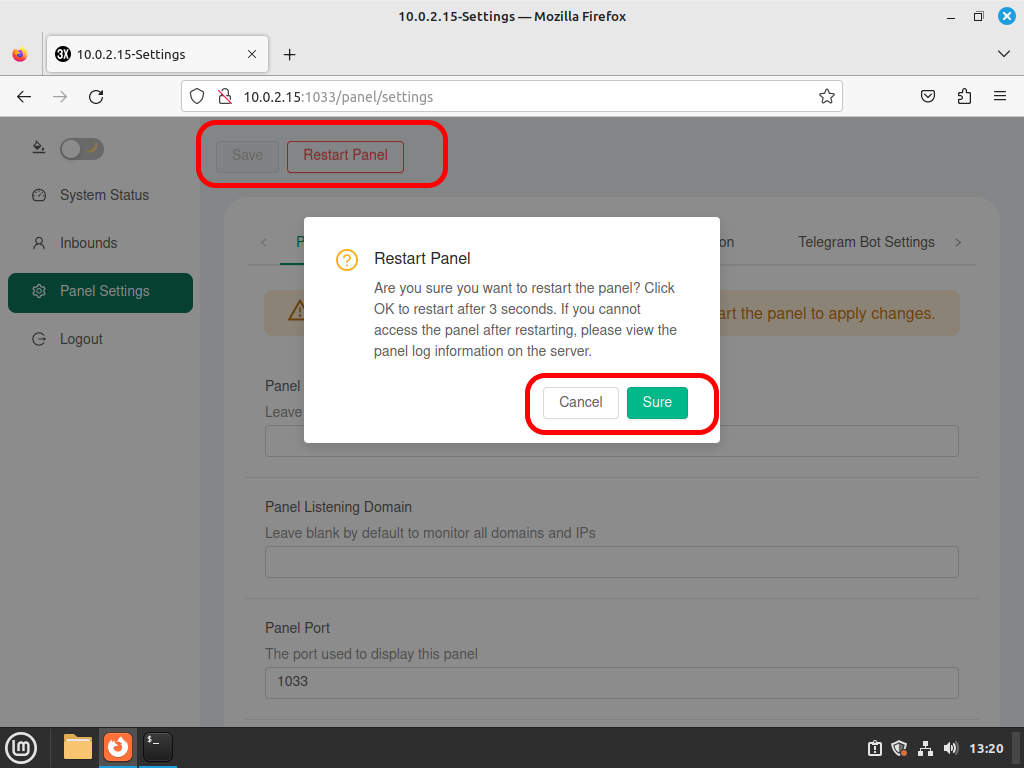
After making changes, scroll up, click Save, and then Restart panel.
Next, go to the Inbounds page and click Add Inbound.
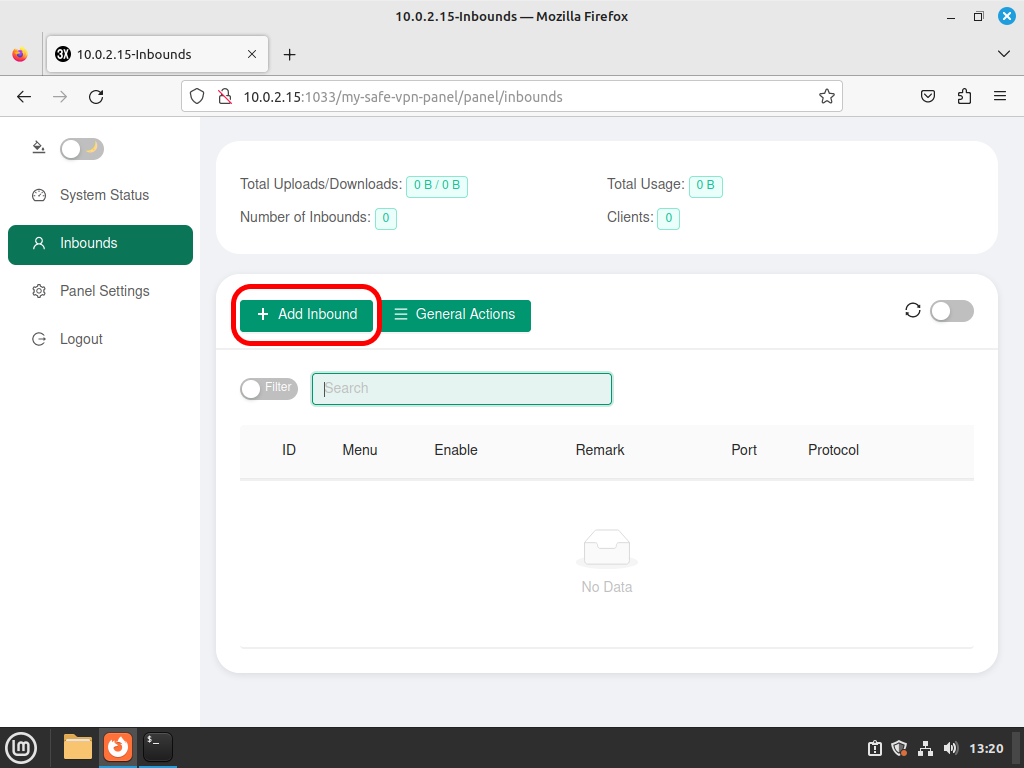
Configure the following settings:
- Under Remark, name your VPN.
- Select Vless as the protocol.
- Use port 443.
- Enable Reality at the bottom.
- Open the Client menu.
- Set Flow to xtls-rprx-vision.
- Enter ftp.debian.org:443 in Dest and ftp.debian.org, www.ftp.debian.org in Server names (you can use any SNI you prefer).
- Click Get new key at the bottom, then hit Create.
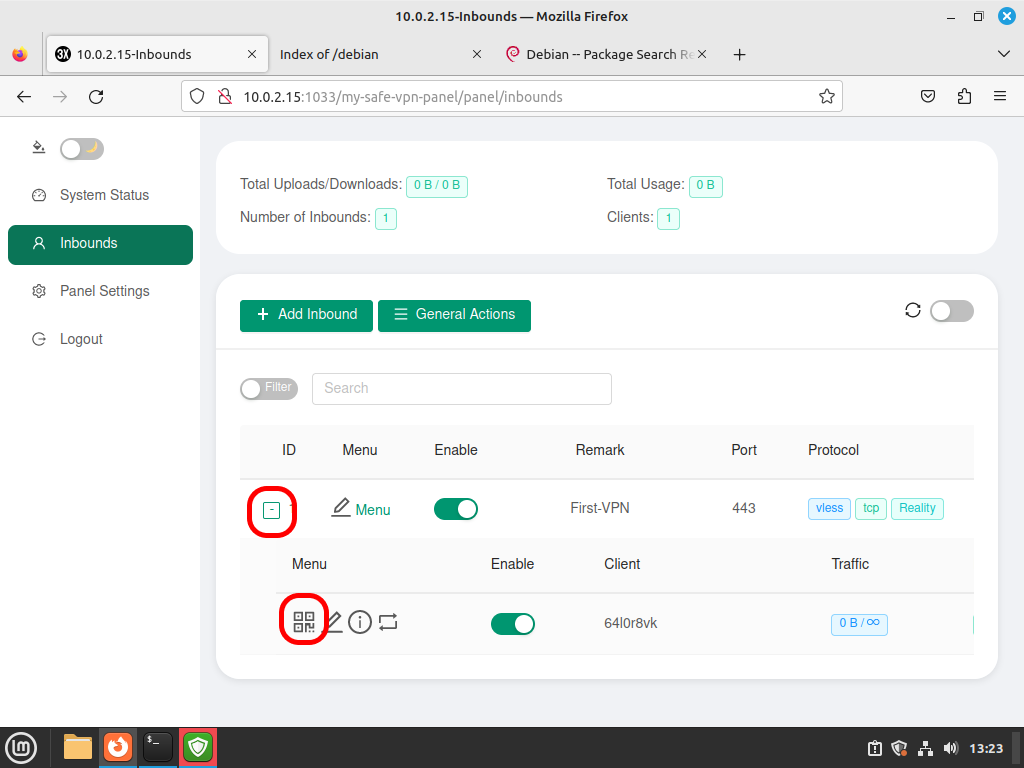
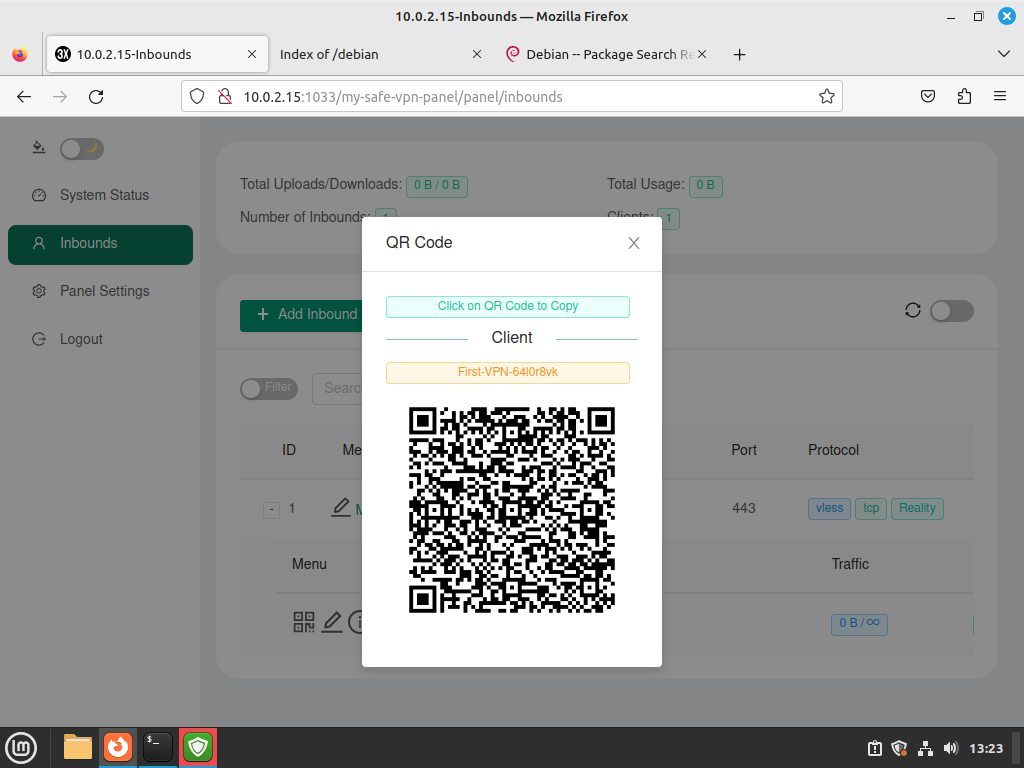
Once done, click on the VPN menu, and you’ll see a QR code for your X-ray VPN!